Golang + SQLBoiler で Azure SQL Database を使ってみる
GoのORM、SQLBoilerを紹介して頂いたのでSQL Databaseで試してみます。 試した環境がAzure+SQL Databaseですが、特にローカルなどでSQL Serverを使った場合と同じかと思います。
Quickstart: Create an Azure SQL Database single databaseを参考にSQL Databaseとサンプルデータベースを作成して、Firewallの設定は完了している状態です。
今回作成したサンプルコードはこちらとなります。
準備
インストール
プロジェクトを作成して、modファイルの作成とsqlboilerに書かれている通りsqlboilerをインストール。
go mod init golang-azure-sqldb-sqlboiler
go get github.com/volatiletech/sqlboiler/v4
go get github.com/volatiletech/null/v8
設定ファイル作成
SQL Databaseの接続情報を記載した設定ファイルを作成します。今回は出力場所を設定ファイルに記載しています。
[sqlboiler.toml]
output   = "./common/models"

[mssql]
dbname  = "sample1"
host    = "*****.database.windows.net"
port    = 1433
user    = "*****"
pass    = "*****"
sslmode = "true"
schema  = "SalesLT"
モデル作成
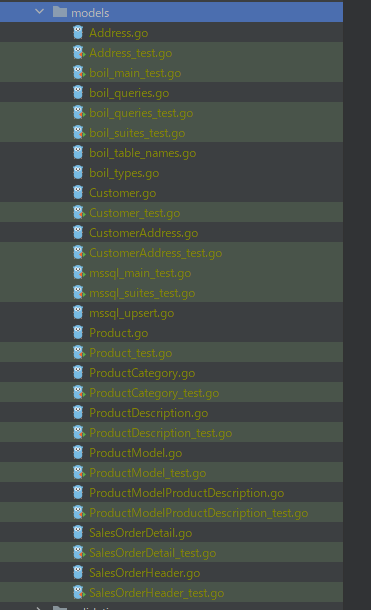
sqlboiler mssql
ファイルが作成されましたので、これで準備完了です。
プログラム作成
試しに Product テーブルの CRUD をする API を作成してみます。
DBへの接続はgo-mssqldb/The connection string can be specified in one of three formatsに記載されているフォーマットとなります。今回はドライバーのMSSQLBuildQueryStringを使用して接続文字列を作成しています。
[config.yaml]
database:
    dbname: "****"
    host: "****"
    port: 1433
    user: "****"
    password: "****"
    sslMode: "****"
    schema: "****"
[cmd/main.go]
   conn  := driver.MSSQLBuildQueryString(
        c.Database.User,
        c.Database.Password,
        c.Database.Dbname,
        c.Database.Host,
        c.Database.Port,
        c.Database.SslMode)
[common/database/db.go]
func NewDB(conn string) (*sql.DB, func(), error) {
    db, err := sql.Open("mssql", conn)
    if err != nil {
        return nil, nil, err
    }

    cleanup := func() {
        if err := db.Close(); err != nil {
            log.Print(err)
        }
    }
    return db, cleanup, nil
}
接続すれば、sqlboilerに記載のように、 Find、 insert、 update、 deleteなどが可能です。今回のサンプルでも、以下のように簡単に実装しています。
[app/product_service.go]
Insert
  if err := prod.Insert(context.Background(), svc.db, boil.Blacklist(productBlacklist...));err != nil {
        return nil, err
    }
Update
  if _, err := prod.Update(context.Background(), svc.db, boil.Blacklist(productBlacklist...)); err != nil {
        return nil, err
    }
Delete
  if _, err := prod.Delete(context.Background(), svc.db); err != nil {
        return err
    }
Find
  prod, err := models.FindProduct(context.Background(), svc.db, id)
    if err != nil {
        return nil, err
    }
JOINもQuery Mod を指定して簡単にできます。例えば以下のようなSQLを発行する場合
SELECT Product.*
FROM [SalesLT].[Product] INNER JOIN SalesLT.ProductCategory AS c
    on Product.ProductCategoryID = c.ProductCategoryID
WHERE (c.Name = @p1);
以下のようなコードになります。
  prods, err := models.Products(
        qm.Select("Product.*"),
        qm.InnerJoin("SalesLT.ProductCategory AS c on Product.ProductCategoryID = c.ProductCategoryID"),
        qm.Where("c.Name = ?", "Road Bikes"),
    ).All(context.Background(), svc.db)
また、生クエリを書くこともできますので同じ処理は以下のようにも書けます。
  var prods []models.Product
    if err := queries.Raw(`
        SELECT Product.*
        FROM [SalesLT].[Product] INNER JOIN SalesLT.ProductCategory AS c
            on Product.ProductCategoryID = c.ProductCategoryID
        WHERE (c.Name = ?);`,
        categoryName,
    ).Bind(context.Background(), svc.db, &prods); err != nil {
        return nil, err
    }
そのほか、Eager Loading は Load を使用します。例えば先ほどの例にLoadを追加して以下とした場合、
  prods, err := models.Products(
        qm.Load(models.ProductRels.ProductIDSalesOrderDetails),
        qm.Select("Product.*"),
        qm.InnerJoin("SalesLT.ProductCategory AS c on Product.ProductCategoryID = c.ProductCategoryID"),
        qm.Where("c.Name = ?", categoryName),
    ).All(context.Background(), svc.db)
以下のようなクエリで関連するSalesOrderDetailを一括で取得します。
SELECT *
FROM [SalesLT].[SalesOrderDetail]
WHERE ([SalesLT].[SalesOrderDetail].[ProductID] IN (@p1,@p2,@p3,@p4,@p5,@p6,@p7,@p8,@p9,@p10,@p11,@p12,@p13,@p14,@p15,@p16,@p17,@p18,@p19,@p20,@p21,@p22,@p23,@p24,@p25,@p26,@p27,@p28,@p29,@p30,@p31,@p32,@p33,@p34,@p35,@p36,@p37,@p38,@p39,@p40,@p41,@p42,@p43));
Goでデータベースファーストな開発をする場合、SQLBoilerは便利で使いやすそうです。Go + SQL Database でもうちょっと試していきたいと思います。 まだまだGoもAzureもわからない事が多くお勉強中の日々です。
Azure Container Instances のGoアプリから Fluentd 経由で Azure Monitor にログ出力
Azure Container Instances(ACI)で動いているGoアプリのログをAzure Monitorに送信してみます。今回はGoアプリから直接送らずに同じコンテナグループ内のFluentd経由でAzure Monitorにログを転送しています
アプリの準備
fluent-logger-golangを使って、GoアプリからFluentdへのログを転送します。README.mdに書かれている通りに使ってみます。
package main

import (
    "fmt"
    "github.com/fluent/fluent-logger-golang/fluent"
    "github.com/gin-gonic/gin"
)

func main() {
    logger, err := fluent.New(fluent.Config{})
    if err != nil {
        fmt.Println(err)
    }
    defer logger.Close()
    tag := "azure-loganalytics.access"

    router := gin.Default()
    router.LoadHTMLGlob("templates/*.html")
    router.GET("/", func(ctx *gin.Context){
        message := "Hello World"
        var data = map[string]string{
            "message": message,
        }
        if err := logger.Post(tag, data); err != nil {
            panic(err)
        }
        ctx.HTML(200, "index.html", gin.H{
            "message": message,
        })
    })
    router.Run()
}
fluentdの準備
fluent-plugin-azure-loganalyticsをインストールしたコンテナを準備します。こちらもREADME.mdに書かれている通りです。
fluent.conf
<source>
  @type  forward
  @id    input1
  port  24224
  tag azure-loganalytics.access
</source>

<match azure-loganalytics.**>
    @type azure-loganalytics
    customer_id XXX
    shared_key XXX
    log_type ApplicationLog
</match>
Dockerfile
FROM fluent/fluentd:v1.12-1

USER root

RUN apk add --no-cache --update --virtual .build-deps \
 sudo build-base ruby-dev \
 # cutomize following instruction as you wish
 && sudo gem install fluent-plugin-azure-loganalytics \
 && sudo gem sources --clear-all \
 && apk del .build-deps \
 && rm -rf /home/fluent/.gem/ruby/2.5.0/cache/*.gem

COPY fluent.conf /fluentd/etc/
COPY entrypoint.sh /bin/

USER fluent
実行
準備完了。適当にローカルで動かして問題なさそうでしたので、Azure Container Registry(ACR)にイメージをプッシュして、ACI でアプリケーションを起動。
docker compose up -f docker-compose.aci.yml
docker-compose.aci.yml
version: '3'
services:
  web:
    image: <ACRNAME>.azurecr.io/fluent-go
    ports:
      - 8080:8080
  fluentd:
    image: <ACRNAME>.azurecr.io/fluent-loganalytics
    ports:
      - "24224:24224"
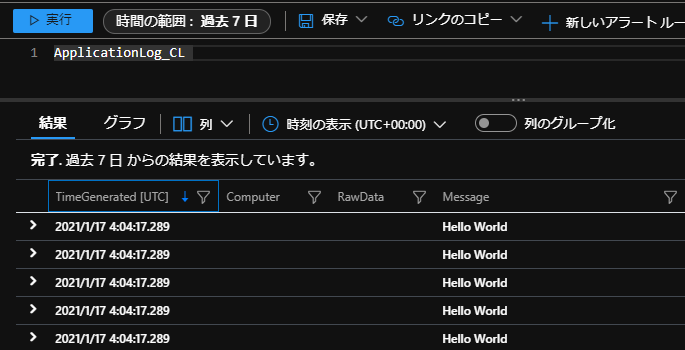
出力出来ました。
ACI以外でGoアプリからAzure Monitorへのログ送信する場合は、Web Apps for ContainerはAzure Monitor にログを送信する (プレビュー)。Virtual MachinesはLogging Driverの方がシンプルですね。
Azure Functions カスタム ハンドラー + Golang でマネージド ID を使用して Azure Database for MySQL に接続する
Azure Functions のカスタム ハンドラー の Timer trigger で Golang のプログラムを実行。 マネージド IDを使用して、Azure Database for MySQL のデータベースへの接続を試してみます。
Function App と MySQL のデータベースは作成済み。MySQLのファイアウォールの設定が終わっている程度の状態です。
準備
マネージドID作成して、Function Appに割り当て
az identity create --resource-group TESTRG  --name TESTIDENTITY
$resourceID=$(az identity show --resource-group TESTRG --name TESTIDENTITY --query id --output tsv)
az functionapp identity assign --resource-group TESTRG --name TESTFUNC --identities $resourceID
MySQLユーザー作成時にクライアントIDを使うのでメモ
az identity show --resource-group Testing --name testscgo1220a1Identity --query clientId --output tsv
MySQL サーバー に Active Directory 管理者を設定
ポータルから Azure Database for MySQL サーバーの [Active Directory 管理者] > [管理者の設定] で設定できます。
Azure CLI で以下のコマンドで実行したときは結構時間がかかり、ポータルの方が早かった感じです。
$objectID=$(az ad user list --display-name "DISPLAYNAME" --query [].objectId --output tsv)
az mysql server ad-admin create --server-name TESTMYSQLSRV --resource-group TESTRG --display-name "DISPLAYNAME" --object-id $objectID
Command group 'mysql server ad-admin' is in preview. It may be changed/removed in a future release.
マネージド ID の MySQL ユーザーを作成してデータベースへの権限を設定
上記で設定した Azure AD 管理者ユーザーで MySQL データベースに接続し、先ほど作成したマネージド ID の MySQL ユーザー(user1)を作成します。ついでにデータベースの権限も適当に設定しておきます。
SET aad_auth_validate_oids_in_tenant = OFF;
CREATE AADUSER 'user1' IDENTIFIED BY 'クライアントID';
GRANT SELECT,INSERT,UPDATE,DELETE ON TESTMYSQLDB.* TO user1@'%'
MySQL Workbench で接続するときは、Advanced の Enable Cleartext Authentication Plugin にチェックします。パスワードに使用するトークンは以下で取得。
az account get-access-token --resource-type oss-rdbms
実装
helloフォルダを作成して、Timer Trigger の設定を記述した function.jsonを入れておけば、設定した時間(今回は毎時30分)に、"/hello" が呼ばれますので、その中に処理を記載します。
MySQLの接続は、Go を使用してトークンを取得するを参考にローカル トークン サービスからMySQLのアクセストークンを取得して、MySQLのパスワードに設定しています。アクセストークンの有効期限については無配慮です。
https://docs.microsoft.com/en-us/azure/mysql/howto-configure-ssl
hello/function.json
{
  "bindings": [
    {
      "schedule": "0 30 * * * *",
      "name": "myTimer",
      "type": "timerTrigger",
      "direction": "in"
    }
  ]
}
main.go
package main

import (
    "crypto/tls"
    "crypto/x509"
    "encoding/json"
    "errors"
    "fmt"
    "github.com/go-sql-driver/mysql"
    "github.com/jinzhu/gorm"
    "io/ioutil"
    "log"
    "net/http"
    "net/url"
    "os"
    "time"
)
type InvokeResponse struct {
    Outputs     map[string]interface{}
    Logs        []string
    ReturnValue interface{}
}
type ReturnValue struct {
    Data string
}
type Hello struct {
    gorm.Model
    Value  string
    DateTime  time.Time
}
type responseJson struct {
    AccessToken string `json:"access_token"`
    RefreshToken string `json:"refresh_token"`
    ExpiresIn string `json:"expires_in"`
    ExpiresOn string `json:"expires_on"`
    NotBefore string `json:"not_before"`
    Resource string `json:"resource"`
    TokenType string `json:"token_type"`
}

func main() {
    customHandlerPort, exists := os.LookupEnv("FUNCTIONS_CUSTOMHANDLER_PORT")
    if exists {
        fmt.Println("FUNCTIONS_CUSTOMHANDLER_PORT: " + customHandlerPort)
    }

    mux := http.NewServeMux()
    mux.HandleFunc("/hello", helloHandler)
    fmt.Println("Go server Listening...on FUNCTIONS_CUSTOMHANDLER_PORT:", customHandlerPort)
    log.Fatal(http.ListenAndServe(":"+customHandlerPort, mux))
}

// Timer Trigger Event
func helloHandler(w http.ResponseWriter, r *http.Request) {
    db, err := sqlConnect()
    if err != nil {
        http.Error(w, err.Error(), http.StatusInternalServerError)
        return
    }
    defer db.Close()

    user := Hello{ Value: "Hello", DateTime : time.Now() }
    db.NewRecord(user)
    db.Create(&user)

    returnValue := ReturnValue{Data: "return val"}
    outputs := make(map[string]interface{})
    outputs["output1"] = "output1"
    invokeResponse := InvokeResponse{outputs,  []string{ "log1" }, returnValue}
    json, err := json.Marshal(invokeResponse)
    if err != nil {
        http.Error(w, err.Error(), http.StatusInternalServerError)
        return
    }
    w.Header().Set("Content-Type", "application/json")
    w.Write(json)
}

func sqlConnect() (database *gorm.DB, err error) {
    json, err := getToken()
    if err != nil {
        return nil, err
    }

    fmt.Println("sqlConnect...")
    DBMS := "mysql"
    USER := "user1@TESTMYSQLSRV"
    PASS := json.AccessToken
    DB := "tcp(TESTMYSQLSRV.mysql.database.azure.com:3306)"
    DBNAME := "TESTMYSQLDB"
    CONNECT := fmt.Sprintf("%s:%s@%s/%s?tls=custom&parseTime=true&allowCleartextPasswords=1",USER , PASS, DB, DBNAME)

    rootCertPool := x509.NewCertPool()
    pem, err := ioutil.ReadFile("./BaltimoreCyberTrustRoot.crt.pem")
    if err != nil {
        return nil, err
    }
    if ok := rootCertPool.AppendCertsFromPEM(pem); !ok {
        return nil, errors.New(fmt.Sprint("Failed to append PEM."))
    }
    mysql.RegisterTLSConfig("custom", &tls.Config{RootCAs: rootCertPool})

    db, err := gorm.Open(DBMS, CONNECT)
    if err != nil {
        return nil, err
    }
    fmt.Println("db connected: ", &db)
    return db, nil
}

// トークン取得
func getToken() (responseJson, error) {
    var r responseJson

    // Create HTTP request for a managed services for Azure resources token to access Azure Resource Manager
    vaultURL := fmt.Sprintf("%s?resource=%s&api-version=2019-08-01&client_id=%s",
        os.Getenv("IDENTITY_ENDPOINT"),
        "https://ossrdbms-aad.database.windows.net",
        "クライアントID")
    msiEndpoint, err := url.Parse(vaultURL)
    if err != nil {
        return r, err
    }

    req, err := http.NewRequest("GET", msiEndpoint.String(), nil)
    if err != nil {
        return r, err
    }
    req.Header.Add("X-IDENTITY-HEADER", os.Getenv("IDENTITY_HEADER"))

    // Call managed services for Azure resources token endpoint
    client := &http.Client{}
    resp, err := client.Do(req)
    if err != nil{
        return r, err
    }

    // Pull out response body
    responseBytes, err := ioutil.ReadAll(resp.Body)
    defer resp.Body.Close()
    if err != nil {
        return r, err
    }
    if resp.StatusCode >= 400 {
        return r, fmt.Errorf("bad response status code %d", resp.StatusCode)
    }

    // Unmarshall response body into struct
    err = json.Unmarshal(responseBytes, &r)
    if err != nil {
        return r, err
    }
    return r, nil
}
参考
Azure Functions カスタム コンテナーで Golang を使う
Azure Functions のカスタム ハンドラーが GA です。カスタム ハンドラーを使うと Golang でもで関数アプリを実装することができます。
ですが・・・今回は、Azure Functions カスタム コンテナーです。Azure Functions Core Tools 使って function app と Dockerfile を作成し、Golang で作ったアプリを簡単に動かすことができますので試してみます。
Azure Functions Core Tools (試したのは 3.0.3160 )でプロジェクトを作成します。
func init go-func-app1 --worker-runtime custom --docker
関数と同じ名前のサブフォルダー(Hello)を作成して、構成ファイル function.json を追加します。シンプルなHTTPトリガーです。
{
  "bindings": [
    {
      "type": "httpTrigger",
      "direction": "in",
      "name": "req",
      "methods": [
        "get"
      ],
      "authLevel": "anonymous"
    },
    {
      "type": "http",
      "direction": "out",
      "name": "res"
    }
  ]
}
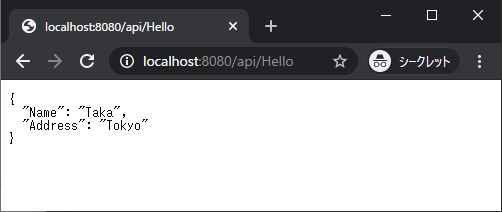
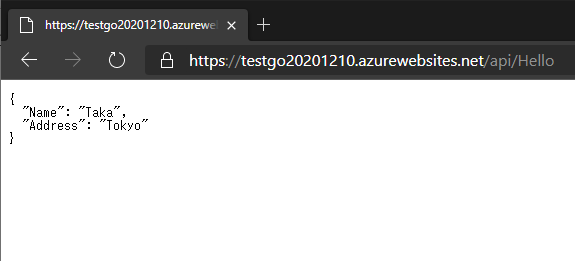
関数を実装します。 /Hello にHTTPリクエストが来たら JSONを返すだけのコードです。
package main

import (
    "encoding/json"
    "fmt"
    "log"
    "net/http"
    "os"
)

func main() {
    customHandlerPort, exists := os.LookupEnv("FUNCTIONS_CUSTOMHANDLER_PORT")
    if exists {
        fmt.Println("FUNCTIONS_CUSTOMHANDLER_PORT: " + customHandlerPort)
    }
    mux := http.NewServeMux()
    mux.HandleFunc("/Hello", helloHandler)
    fmt.Println("Go server Listening...on FUNCTIONS_CUSTOMHANDLER_PORT:", customHandlerPort)
    log.Fatal(http.ListenAndServe(":"+customHandlerPort, mux))
}
type InvokeResponse struct {
    Outputs     map[string]interface{}
    Logs        []string
    ReturnValue interface{}
}
type user struct {
    Name string
    Address  string
}
func helloHandler(w http.ResponseWriter, r *http.Request) {
    outputs := make(map[string]interface{})
    resData := make(map[string]interface{})
    resData["body"] = user{
        Name: "Taka",
        Address:  "Tokyo",
    }
    outputs["res"] = resData
    invokeResponse := InvokeResponse{outputs, nil, nil}
    responseJson, _ := json.Marshal(invokeResponse)
    w.Header().Set("Content-Type", "application/json")
    w.Write(responseJson)
}
ファイル構成はこんな感じです。
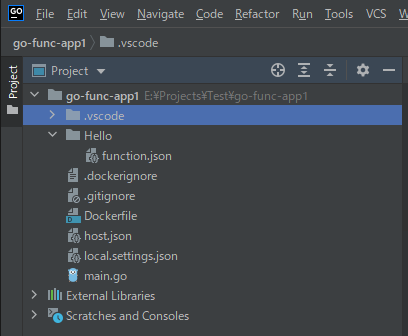
host.jsonのdefaultExecutablePathにビルドで作成される main を指定します。
"defaultExecutablePath": "main",
Dockerfile に Go のビルドとコピーなどを追加して準備は終わりです。
FROM golang:latest
COPY . /go/app
WORKDIR /go/app
RUN CGO_ENABLED=0 GOOS=linux go build -a -installsuffix cgo -o main .

FROM mcr.microsoft.com/azure-functions/dotnet:3.0-appservice
ENV AzureWebJobsScriptRoot=/home/site/wwwroot \
    AzureFunctionsJobHost__Logging__Console__IsEnabled=true

COPY --from=0 /go/app/ /home/site/wwwroot
ビルドしてローカルで確認してみます。
docker build -t go-func-app1:latest .
docker run -p 8080:80 -it go-func-app1:latest .
あとは、 Azure Container Registrなどに Push して functions に設定すれば完了です。
Golang で Azure Blob Storage
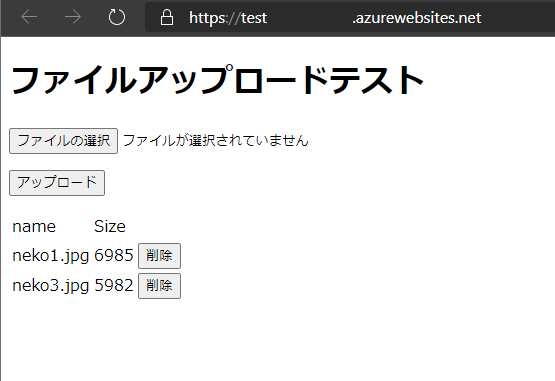
Go 始めてみようと Tour of Go を終えた後、Azure Blob Storage を使った簡単なサンプルWebサイトを作った備忘録です。 Webフレームワークは最初に見かけた Gin を使って、Blobの操作は クイック スタート: Go を使用して BLOB をアップロード、ダウンロード、および一覧表示する を参考にしています。
作ったサンプルから、エラー処理などを省いてBLOB操作部分を抜粋すると以下な感じです。
main.go
一覧
   for marker := (azblob.Marker{}); marker.NotDone(); {
        listBlob, err := containerURL.ListBlobsFlatSegment(ctx, marker, azblob.ListBlobsSegmentOptions{})
        if err != nil {
            ctx.Error(err).SetType(gin.ErrorTypePublic)
            return
        }
        marker = listBlob.NextMarker

        for _, blobInfo := range listBlob.Segment.BlobItems {
            items = append(items, blobItem{
                Name: blobInfo.Name,
                Size: *blobInfo.Properties.ContentLength,
            })
        }
    }
アップロード
    formFiles := form.File["file1"]
    formFile := formFiles[0]
    fileName := formFile.Filename
    blobURL := containerURL.NewBlockBlobURL(fileName)

    file, err := formFile.Open()
    defer file.Close()
    if err != nil {
        ctx.Error(err).SetType(gin.ErrorTypePublic)
        return
    }
    buf := bytes.NewBuffer(nil)
    if _, err := io.Copy(buf, file); err != nil {
        ctx.Error(err).SetType(gin.ErrorTypePublic)
        return
    }

    _, err = azblob.UploadBufferToBlockBlob(ctx, buf.Bytes(), blobURL, azblob.UploadToBlockBlobOptions{
        BlockSize:   4 * 1024 * 1024,
        Parallelism: 16})
削除
_, err := blobURL.Delete(ctx, azblob.DeleteSnapshotsOptionNone, azblob.BlobAccessConditions{})
Web App for Containers にデプロイして動作確認。
DockerFile
FROM golang:latest
RUN go get -u github.com/Azure/azure-storage-blob-go/azblob && \
  go get -u github.com/gin-gonic/gin
COPY . /go/app
WORKDIR /go/app
RUN CGO_ENABLED=0 GOOS=linux go build -a -installsuffix cgo -o main .

FROM alpine:latest
RUN apk --no-cache add ca-certificates
WORKDIR /root/
COPY --from=0 /go/app/ .
CMD ["./main"]
Azure IoT Hub でメッセージの送信と受信を試してみた
IoT Hubでメッセージの送信と受信を試したメモです。 UWPアプリからIoT Hubにメッセージを送信して、 Functions で受信したメッセージをそのままデバイスに送信しているだけです。
公式サイトのドキュメントや、サンプルも豊富にあるので簡単に試すことできます。
作業はこんな感じです。
- Azure にリソース作成
- IoT Hubにデバイスを登録
- Functions で動作させるEcho Function作成
- Device用アプリの作成
- 動作確認
Azure にリソース作成
IoT Hub と Functions を作成。cloud-to-device メッセージングを使うので、IoT Hub は無料又はStandard。
Azure IoT Hubにデバイスを登録
IoT Hubにデバイスを登録します。
Azure Cloud Shell を使用する を参考にコマンド、
az extension add --name azure-iot
az iot hub device-identity create --hub-name HubName11--device-id device1
AzureポータルからGUI、Azure IoT エクスプローラーなどで簡単に作成。
Functions で動作させるEchoプログラムを作成
受信した値をそのまま送信しているだけです。
    public static class Function1
    {
        private static readonly ServiceClient ServiceClient = ServiceClient.CreateFromConnectionString("接続文字列");

        [FunctionName("Function1")]
        public static async Task Run(
            [EventHubTrigger("HubName11", Connection = "EventHubConnectionAppSetting")] EventData[] events, ILogger log)
        {
            foreach (var eventData in events)
            {
                var id = eventData.SystemProperties.FirstOrDefault(m => m.Key == "iothub-connection-device-id");
                var commandMessage = new Message(eventData.Body.Array);
                await ServiceClient.SendAsync(id.Value.ToString(), commandMessage);
                await Task.Yield();
            }
        }
    }
"接続文字列"は、Azureポータルの「設定」> 「共有アクセス ポリシー」にある「接続文字列」の値。EventHubConnectionAppSettingは、「設定」 > 「組み込みのエンドポイント」の「イベントハブ互換エンドポイント」の値です。
Device用アプリ作成
ここにあるサンプルを参考に、今回はUWPアプリでメッセージの送信と受信アプリを作成。
MainPage.xaml.cs
    public sealed partial class MainPage : Page
    {
        private readonly DeviceClient _deviceClient = DeviceClient.CreateFromConnectionString("接続文字列", TransportType.Http1);
        private readonly bool _receiving = true;

        public MainPage()
        {
            InitializeComponent();
            ReceiveMessagesAsync();
        }

        private readonly ObservableCollection<string> _contacts = new ObservableCollection<string>();

        public ObservableCollection<string> Contacts => this._contacts;

        private async void SendButton_Click(object sender, RoutedEventArgs e)
        {
            var msg = new Message(Encoding.UTF8.GetBytes(SendMessageTextBox.Text));
            await _deviceClient.SendEventAsync(msg);
            var s = "送信:" + SendMessageTextBox.Text + " >>";
            _contacts.Insert(0, s);
        }

        private async void ReceiveMessagesAsync()
        {
            while (_receiving)
            {
                var receivedMessage = await _deviceClient.ReceiveAsync();

                if (receivedMessage != null)
                {
                    var s = "受信:" + "<< " + Encoding.UTF8.GetString(receivedMessage.GetBytes());
                    _contacts.Insert(0, s);
                    await _deviceClient.CompleteAsync(receivedMessage);
                }
            }
        }

        private void MessageTextBox_TextChanged(object sender, TextChangedEventArgs e)
        {
            SendButton.IsEnabled = !string.IsNullOrEmpty(SendMessageTextBox.Text);
        }

    }
MainPage.xaml
<Page
    x:Class="App1.MainPage"
    xmlns="http://schemas.microsoft.com/winfx/2006/xaml/presentation"
    xmlns:x="http://schemas.microsoft.com/winfx/2006/xaml"
    xmlns:local="using:App1"
    xmlns:d="http://schemas.microsoft.com/expression/blend/2008"
    xmlns:mc="http://schemas.openxmlformats.org/markup-compatibility/2006"
    mc:Ignorable="d"
    Width="1000"
    Background="{ThemeResource ApplicationPageBackgroundThemeBrush}">

    <Grid HorizontalAlignment="Left" Width="1000">
        <TextBox HorizontalAlignment="Left"
                 Margin="57,56,0,0"
                 Name="SendMessageTextBox"
                 Text=""
                 TextWrapping="Wrap"
                 VerticalAlignment="Top"
                 Header="送信メッセージ"
                 Width="726"
                 TextChanged="MessageTextBox_TextChanged"/>
        <Button Content="送信"
                Margin="800,80,0,0"
                VerticalAlignment="Top"
                Name="SendButton"
                IsEnabled="False"
                Click="SendButton_Click"/>

        <ListView x:Name="FruitsList" Margin="57,157,57,80" ItemsSource="{x:Bind Contacts}">
            <UIElement.RenderTransform>
                <MatrixTransform/>
            </UIElement.RenderTransform>
            <ListView.ItemTemplate>
                <DataTemplate x:DataType="x:String">
                    <Grid>
                        <TextBlock Text="{x:Bind}" FontSize="14" Grid.Column="0"/>
                    </Grid>
                </DataTemplate>
            </ListView.ItemTemplate>
        </ListView>

    </Grid>
</Page>
動作確認
Functions をAzureにデプロイし、Deviceアプリからメッセージの送信・受信を確認して完了です。

参考
クイック スタート:デバイスから IoT ハブに利用統計情報を送信してバックエンド アプリケーションで読み取る (.NET)
Azure Pipelines で Expo にデプロイ
Expo公式サイトの Setting up Continuous Integration に Azure Pipelines の設定なかったので記載。
やってることは同じですし、他とちょっとタスク名が違う程度です。
- Jestでテスト
- Expoのユーザー名とパスワードを Key Vault から取得
- expo-cli で login と publish
Deploy to Expo
trigger:
- master

pool:
  vmImage: 'ubuntu-latest'

variables:
  npm_config_cache: $(Pipeline.Workspace)/.npm

steps:
- task: NodeTool@0
  inputs:
    versionSpec: '12.x'
  displayName: 'Install Node.js'

- task: Cache@2
  inputs:
    key: 'npm | "$(Agent.OS)" | package-lock.json'
    restoreKeys: |
       npm | "$(Agent.OS)"
    path: $(npm_config_cache)
  displayName: Cache npm

- script: |
    npm ci
    npm install expo
    npm test
  displayName: 'npm test'

- task: AzureKeyVault@1
  inputs:
    azureSubscription: '[SERVICE CONNECTION]'
    KeyVaultName: '[KeyVault]'
    SecretsFilter: '*'
    RunAsPreJob: false

- script: |
    npx expo-cli login -u $(expo-username) -p $(expo-password)
    npx expo-cli publish --non-interactive
  displayName: 'expo publish'
OTAではなくビルドの場合は、「publish」を「build」に変更。iOSの場合は以下のような感じです。
npx expo-cli build:ios --no-wait --non-interactive --release-channel staging
Key Vault の設定については以下に詳しく記載されています。
Key VaultではなくVariables を使う場合は以下をご覧ください。